
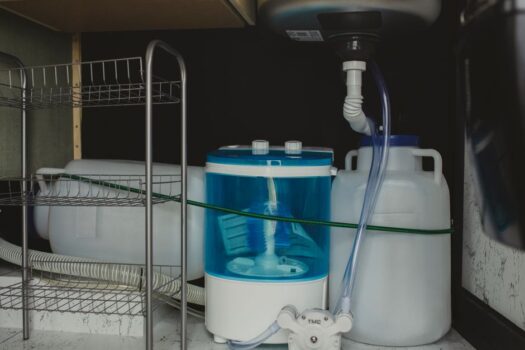
You’re standing under your kitchen sink, looking at that filter box, and wondering if you actually need to call a plumber. Good news: you don’t. Under sink water filters are designed for homeowners like you to install without special tools, plumbing experience, or a contractor’s bill. Most people have these systems running in under 30 minutes, and the result is fresh, filtered drinking water straight from your tap.
If you’re concerned about water quality but want to skip the expense and hassle of professional installation, this guide walks you through the exact process. We’ll cover what you need to know before you start, the step-by-step installation, and how to verify everything is working correctly.
Related: How to Choose a Water Filtration System: A Practical Guide
Why Choose an Under Sink Water Filter
Under sink filters target the water you actually drink and cook with. Unlike whole-house systems, they’re affordable, easy to maintain, and you can see exactly what they’re filtering. Most households see measurable improvements in taste, odor, and clarity within the first few uses.
Related: Under Sink Water Filter Replacement Guide: DIY Steps That Work
Related: How Often to Change Whole House Water Filter: The Real Timeline
Related: Best Whole House Water Filter System for Your Home
Related: Best Portable Water Filter for Camping in 2026
The real advantage? You’re in control. No waiting for appointments. No surprise labor costs. And if something doesn’t feel right during installation, you can troubleshoot it yourself or reach out for support. When you shop at WaterPurityGuide, every filter system comes with all the hardware you need, so there are no hidden trips to the hardware store.
What You’ll Need Before Installation
Before you crawl under the sink, gather these items:
- Your filter kit (should include the filter housing, tubing, adapters, and mounting hardware)
- An adjustable wrench or two (to disconnect the cold water line)
- A bucket or towel (water will drip when you disconnect the line)
- Optional: a flashlight (it gets dark under there)
That’s genuinely it. Most modern under sink filters use push-fit fittings, which means no soldering, no special plumbing tools, and no need to cut pipes. The system is designed so you can connect everything by hand or with basic wrenches.
The first critical step: shut off the cold water line underneath your sink. Look for a small valve on the pipe coming in from the wall. Turn it clockwise until it stops. This prevents water from spraying everywhere when you disconnect the supply line.
Under Sink Water Filter Installation: Step by Step
Step 1: Prepare Your Space
Turn off the cold water supply, then open the faucet above to release any remaining pressure in the line. Have your bucket or towel ready. When you disconnect the supply line, a little water will come out, and that’s completely normal.
Step 2: Connect the Adapter to Your Water Line
Using your wrench, carefully disconnect the cold water supply line from under the sink. This is where your bucket catches the drips. Now you’ll see the inlet connection point. Screw the adapter (provided in your kit) onto this connection by hand first, then tighten with the wrench. Don’t over-tighten; hand-tight plus a quarter turn is usually enough.
Step 3: Mount the Filter Housing
Most under sink filters mount on the wall or cabinet side using the included bracket and hardware. Find a spot that’s accessible for future filter changes but out of the way. Drill or screw the mounting bracket into place, then slide the filter housing onto the bracket. Make sure it’s secure and won’t shift around.
Step 4: Run the Inlet Tubing
Connect the black tubing from the adapter to the inlet port on your filter housing. Push-fit connections work by sliding the tubing straight into the port until it seats. Don’t force it, but do push firmly until you feel resistance. The tubing should not pull out easily once connected. This is where proper orientation matters: the inlet (water coming in) connects to the labeled inlet port, not the outlet.
Step 5: Connect the Outlet Tubing
Run tubing from the outlet port on the filter housing to your faucet or drinking spout. Many homeowners add a dedicated filtered water faucet at this stage, which you can install through a hole drilled in the sink or countertop. If you’re just connecting to your existing faucet, the outlet tubing goes to the faucet inlet.
Related: Best Countertop Water Filter Pitchers 2026: Top 6 Ranked
Related: Best Water Filter for Sink Faucet 2026: Top 5 Ranked
Related: Best Water Filters 2026: Top 5 Ranked & Compared
Related: Best Under Sink Water Filters 2026: Top 5 Ranked
Related: Best RV Water Filters for Camping Trips 2026: Top 5 Ranked
Related: Best Water Softeners 2026: Top 5 Ranked & Compared
Related: Best Water Filters for Home 2026: Top 6 Ranked
Step 6: Reconnect the Cold Water Line
Once the outlet is secure, reconnect the original cold water line to the secondary outlet port on the adapter. This allows unfiltered water to continue flowing to your main faucet while filtered water flows through the system. Tighten hand-tight, then add a quarter turn with your wrench.
Step 7: Flush the System
Turn the water back on slowly. Open the filtered faucet and let it run for 5-10 minutes. You may see discoloration, air bubbles, or black particles. This is the filter media rinsing out, and it’s normal. Keep flushing until the water runs clear and no air comes out.
How to Verify Your Installation Is Correct

After you finish, test both water flows. Your main kitchen faucet should have normal pressure. Your filtered faucet should also have good flow, though it might be slightly lower than your main faucet (that’s expected). If water pressure from the filtered tap is weak or slow, the filter might be installed backwards or the tubing connections are loose.
A common installation error is connecting the filter backwards. The filter media has a specific orientation inside the housing. If water is forced against the media instead of through it, flow drops significantly. Check the direction arrow on your filter housing and make sure water enters through the inlet side as marked.
Run your filtered water for a few minutes and taste it. You should notice improved taste and clarity compared to your main faucet. If you’re not seeing improvement after 24 hours of normal use, double-check your connections and filter orientation. Need help troubleshooting? The team at WaterPurityGuide can walk you through any concerns.
Maintenance and Filter Replacement
Your under sink filter will need replacement every 6 to 12 months depending on water quality and usage. Changing it out is faster than the initial installation. You simply turn off the water, unscrew the old filter housing from its mount, replace the cartridge inside, and screw it back on. No re-tubing needed.
Related: Best UV Water Purifier Replacement Bulbs 2026: Top 5 Ranked
Related: Best Water Softener Replacement Parts 2026: Top 5 Ranked
Related: Best Salt-Free Water Conditioner Systems 2026: Top 5 Ranked
Related: Best Under Sink Reverse Osmosis Systems 2026: Top 5 Ranked
Related: Best Reverse Osmosis System Under Sink 2026: Top 5 Ranked
Related: Best Reverse Osmosis Water Filters 2026: Top 6 Ranked
Related: Best Water Purification Systems 2026: Top 6 Ranked
Keep an eye on water flow. If it drops noticeably over time, that’s your sign the filter is saturated and needs changing. WaterPurityGuide offers replacement cartridges and maintenance kits so you can keep your system running smoothly without ordering from multiple places.
Common Installation Questions Answered
Do I really need any special tools to install an under sink water filter?
No. An adjustable wrench is helpful for tightening connections, but most push-fit systems don’t even require that. Many people install them with just their hands. The components are designed to work together without soldering, drilling pipes, or cutting lines.
What if my water pressure drops after installation?
Check two things: the filter orientation (is it installed backwards?) and the tubing connections (are they fully seated?). If the filter is backwards, water is fighting against the media instead of flowing through it, which cuts pressure dramatically. Disconnect the inlet tubing and reconnect it firmly. If pressure is still low, the filter cartridge might be clogged and needs replacement.
Can I install an under sink filter in an apartment or rental?
Yes, and many apartment dwellers do. The system doesn’t require permanent modifications to plumbing. When you move, you can remove it completely, and the connections return to normal. Some landlords appreciate that you’re improving water quality without structural changes.
How do I know if my filter is working?
Taste and clarity are your first indicators. Most people notice improvement immediately. You can also monitor flow rate. A working filter lets water through steadily. If flow slows dramatically, it’s time to replace the cartridge. For deeper verification, consider a water quality testing kit from WaterPurityGuide to measure specific contaminants before and after filtration.